
Many Electron apps interact with a remote web service or API, which probably means the application has to store credentials (could be API access tokens, password, etc) for that. How do you do that securely? Simply storing it in plain text in an unprotected file can be a security issue.
TL;DR Code for this example is here under the storing-sensitive-data folder. ccnokes/electron-tutorials- Collection of small sample Electron apps.
Mac, Windows, and Linux all offer secure solutions to do this by using an encryption key derived from the user’s login. Mac OS has Keychain, Windows has Credentials Manager, and Linux has Gnome Keyring. APIs for these are available in C++ for each of them, so we need a native node addon that provides bindings for those APIs to Javascript. This is where node-keytar comes in.
Node-keytar has a simple API. It gives you methods like getPassword, addPassword, and replacePassword that get, add, modify, and delete entries from the OS’s password store. Note, we’re using the word “password” here loosely — “password” is just a string and it could instead be an API access token.
Let’s add a password for testing. We’ll just do it in plain node.js first. Just npm install keytar create an index.js file and add the following:
/**
  *  The API for this is:
  *  addPassword(service, account, password)
  */
keytar.addPassword('KeytarTest', 'AccountName', 'secret');
In an actual Electron app, the service parameter will be your app name. account, as expected, is the account name. For example, if you were storing an access token to a 3rd party API like StackExchange, I’d call it just that.
Run that and you should see something like below in mac OS’s Keychain app.
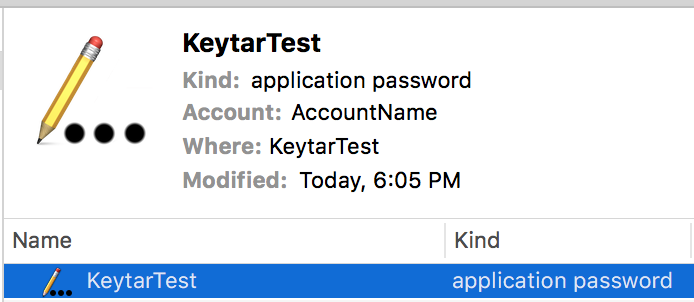
If we run addPassword again on a service and account that’s already in the store, the method will return false and it won’t be updated. Hence the need for replacePassword . However, running replacePassword on a non-existent service and account will create a new one, so it’s like an upsert.
In Keychain, if you right click the KeytarTest row > Get Info, then click Access Control, you’ll see:
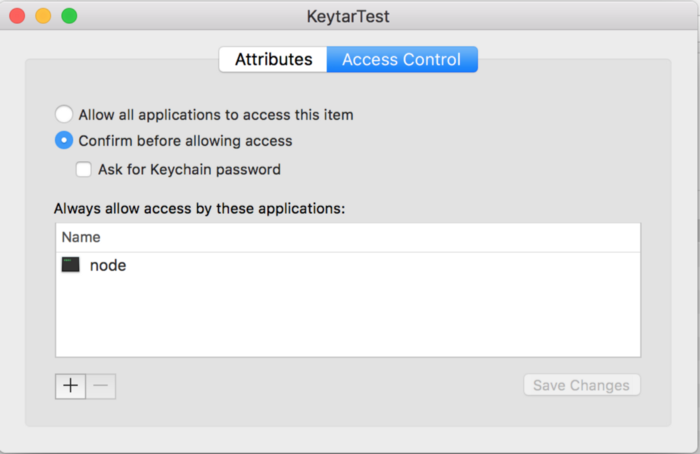
This is important. Because node.js added the password, any node.js process later on can access it without prompting the user. (When you package your Electron app, this value will be your app’s name and only your app will have access without prompting). This is nice because it’s not a good experience when an app is constantly prompting the user to access the Keychain. Remember that the user could change these values at any time, so make sure your code handles scenarios where the user deletes your password data from their store unexpectedly.
Let’s retrieve the password we just stored.
const secret = keytar.getPassword('KeytarTest', 'AccountName');
console.log(secret); // "supersecret"
We get the string we stored. Yay! This method takes around 40ms to complete on my mid-2015 MacBook Pro, probably because of the time it takes to decrypt. So it’s not the fastest method. That may or may not have design implications in your app if you are getting it a lot.
If you try to getPassword on a password that was created by another app, it’ll prompt a dialog verifying that’s okay. So no other application can access your saved password(s) unless the user explicitly grants permission.
Now you can leverage node-keytar your Electron application using the same methods outlined above. When installing node-keytar for use in an Electron app, it needs to be compiled against Electron’s version of v8. You can follow this guide on how to do that.
One other important note: I recommend you only call node-keytar from the main process. If you set a password from the main process and then attempt to get it from a renderer process, it’ll prompt a permissions dialog for the user (this is macOS only, Windows doesn’t seem to mind either way). Additionally, I think it’s cleaner and clearer to the user if the access control list has your app name and it’s icon, instead of MyApp Helper and the generic app icon which is what you get when a renderer sets it.
That’s it! Node-keytar offers a simple way to better secure your application.
P.S. I recommend watching this 2 minute keytar solo (starting around 2:30) from Kool & the Gang. It’ll make you a better programmer.
